Meta Ads Conversions API Event Tracking sends website and funnel events directly to Meta for more accurate reporting, even when pixel tracking is limited by browser settings or ad blockers. This guide will show you how to set up the Conversions API, enable event tracking, and verify that your events are working correctly.
This guide is perfect if you want to:
Capture events that may be missed by browser-based pixel tracking
Improve the accuracy and reliability of your Meta conversion tracking
Help Meta optimise your ad delivery using more complete data
Reduce tracking gaps caused by ad blockers, cookie limits, or slow page loads
Ensure your Meta campaigns receive the conversion events needed for optimisation

In this step, you will install your Facebook Pixel into your Ivorey™ website or funnel. Please note that you need to already have a pixel set up inside Facebook, and your website or funnel set up inside Ivorey™.
From the main Ivorey™ menu, go to [Site Pages] > [Funnels] or [Websites], depending on where you built the site you want tracked
Inside the website or funnel, go to the [Settings] tab and install your Facebook Pixel Code under the Head Tracking Code section. This will apply the pixel to all pages within that website or funnel. Repeat this step if you want to track multiple websites/funnels
If you want to apply pixel code to an individual page, click into the page editor of the specific page you want the code on, and then select the [Tracking Code] icon in the top toolbar. Paste your pixel code inside the Header Tracking area
Ensure to [publish] your page
Ivorey™ includes a workflow action called Meta Conversion API. This action sends a conversion event to Meta, such as a lead or a purchase.
If you’ve set up a freebie opt-in or a paid offer, you likely already have a workflow that runs after that action (for example, tagging the contact or sending emails). Inside that same workflow, you can add the Meta Conversion API step to also send the conversion event to Meta.
Ivorey™ has an action available inside all workflows called "Facebook Conversion API". This trigger sends an event to Meta to track a conversion, such as a purchase or a lead. If you have setup a freebie opt-in or an offer available for purchase, you should already have a workflow for each that tells Ivorey™ what to do after the event - e.g. to tag the contact, send an email etc. Inside each of those workflows, you can now add the "Facebook Conversion API" step to also send an event to Meta.
From the main Ivorey™ menu, go to [Workflows]. Select the workflow you want to update, or click [Create Workflow] to start a new one
Add an action step in the workflow and look for the Meta Conversion API option. Once selected, the settings panel will open on the right. Apply the following settings inside the action step:
Set the event type to Funnel Event
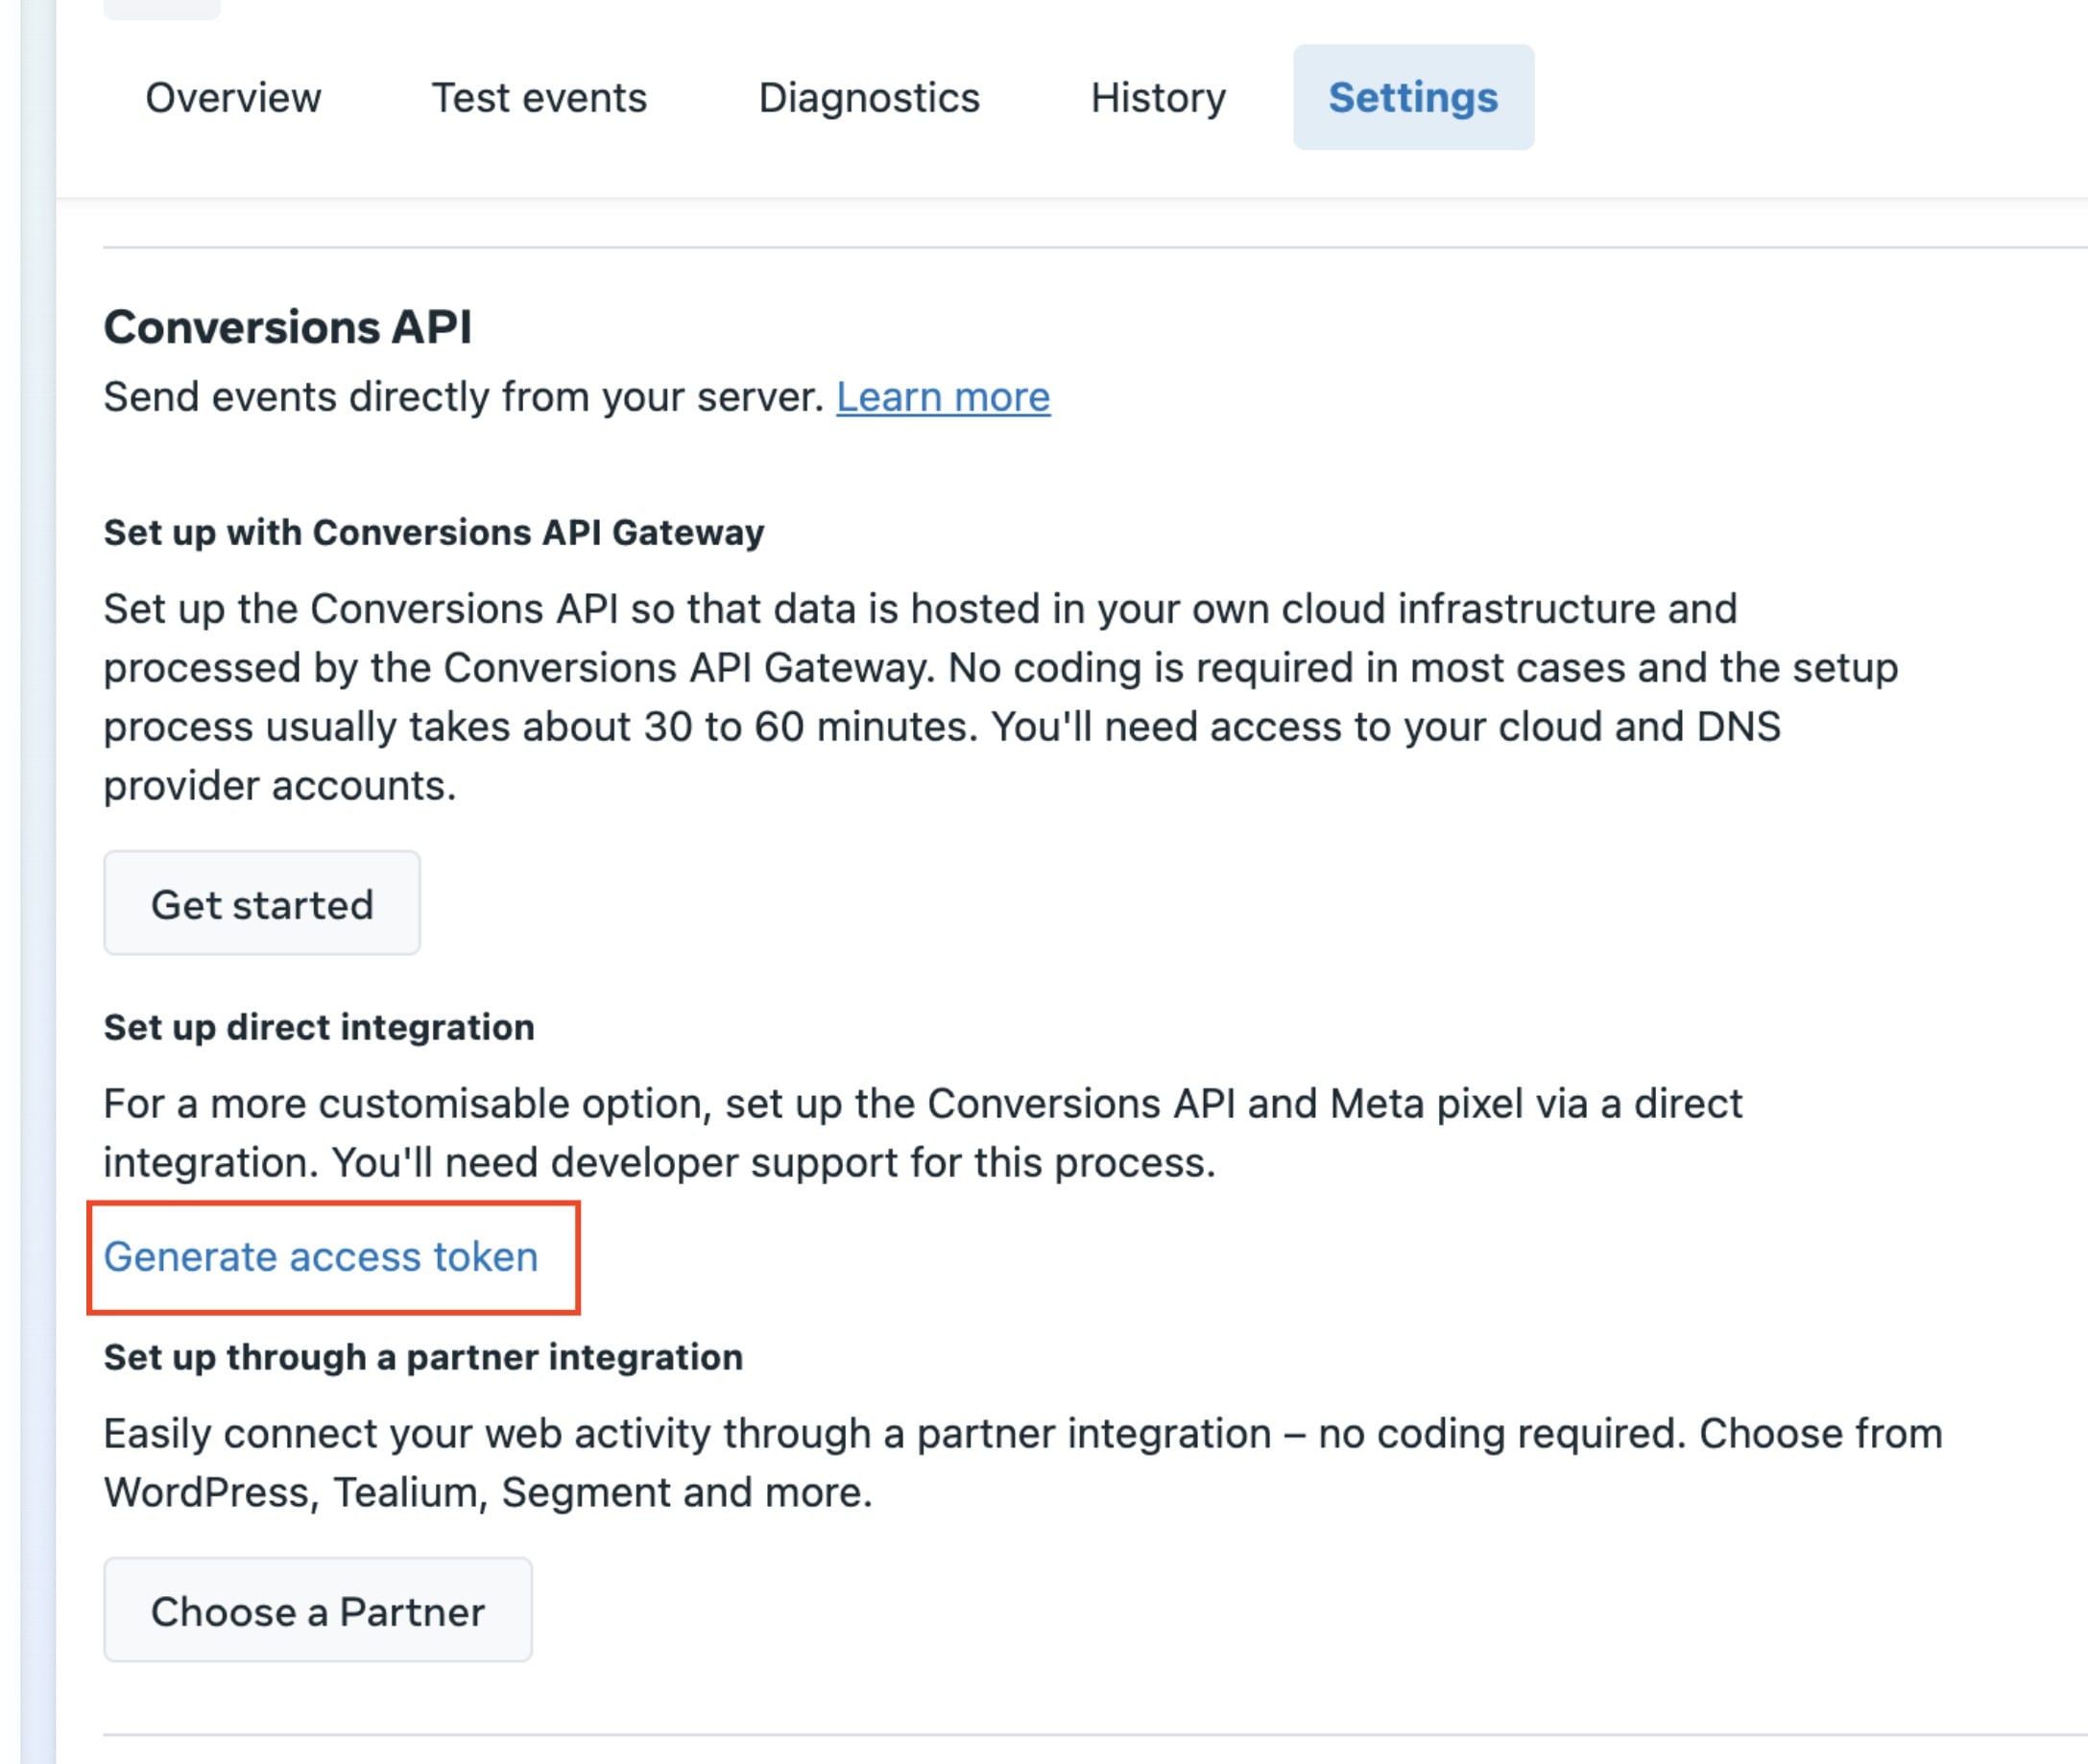
For the Access Token, head over to your Facebook Events Manager > [Data Sources] > [Settings] > Scroll down and click on [Generate Access Token]. After the access token is generated, copy it and paste it into the Access Token field in your workflow settings
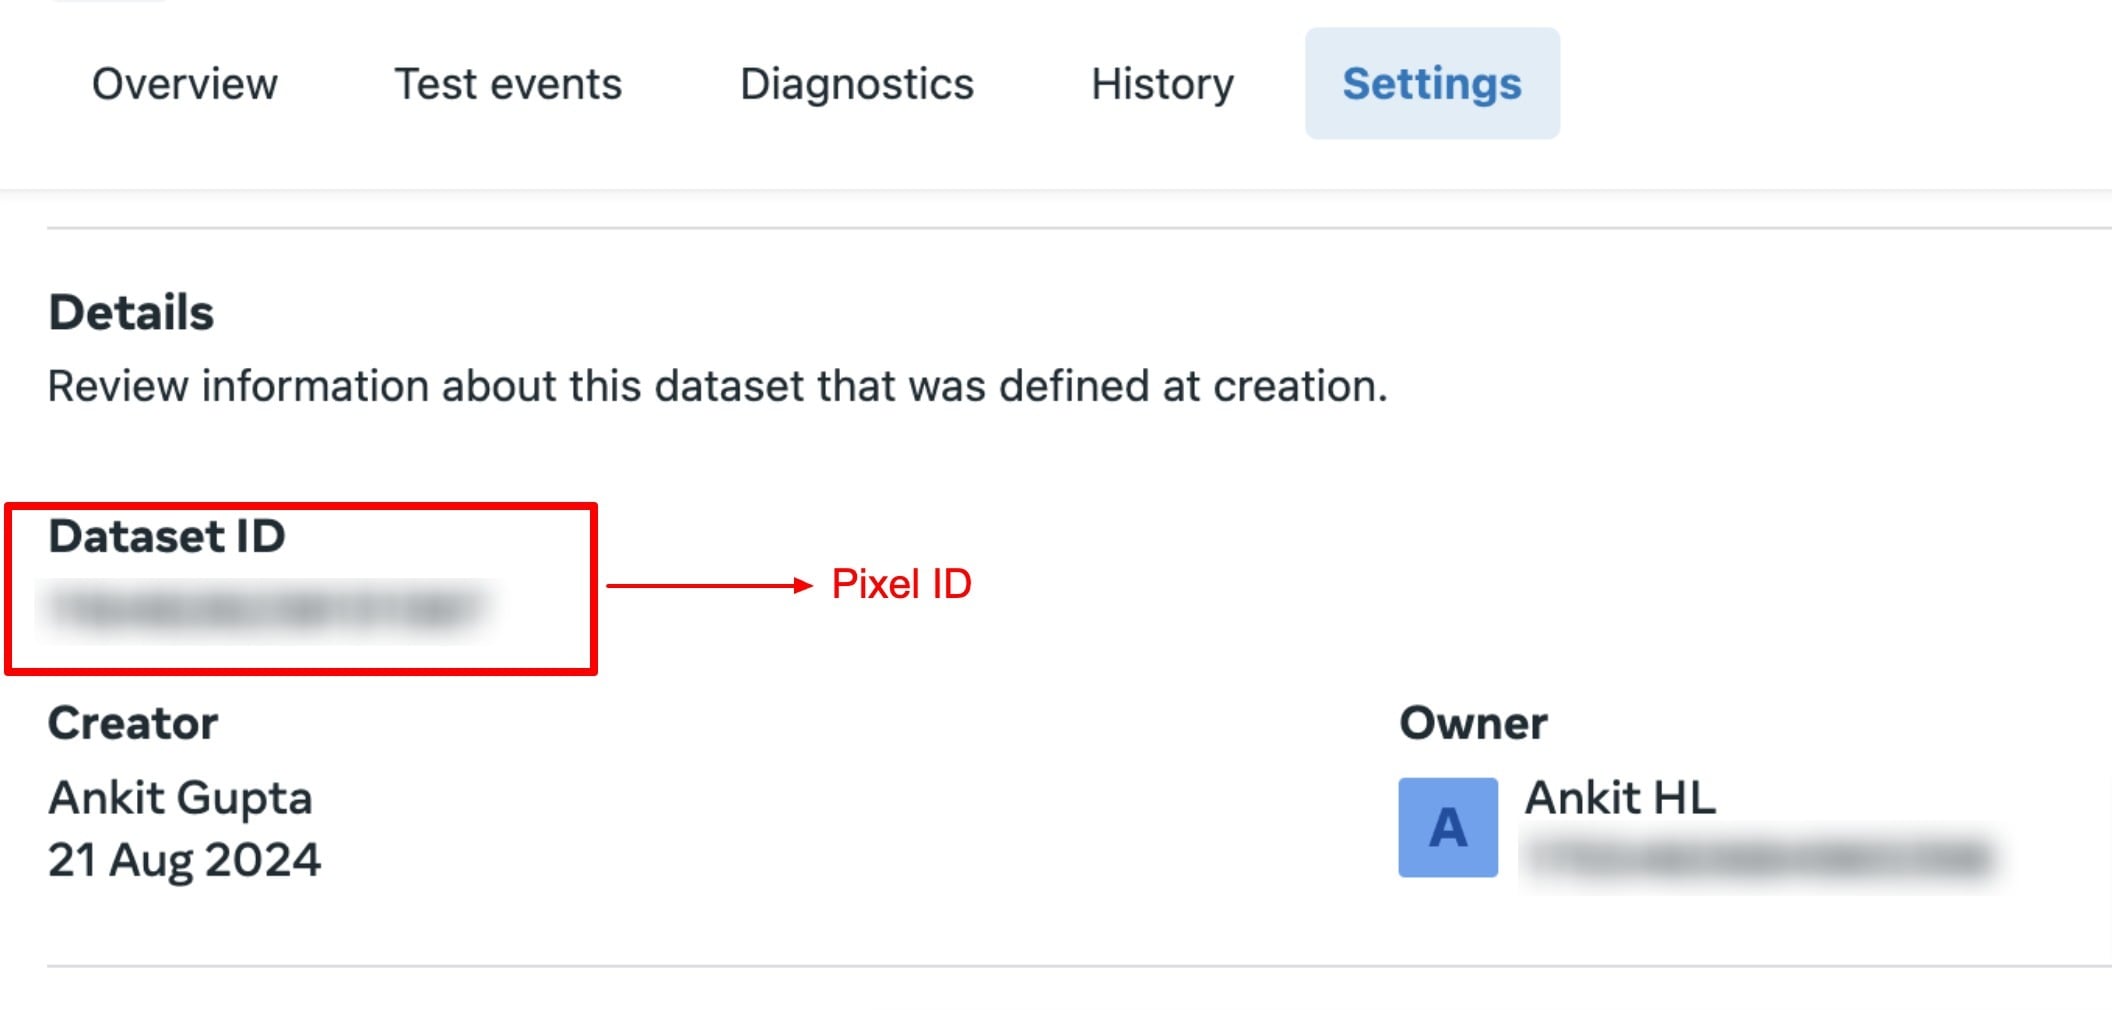
For the Pixel ID, head over to your Facebook Events Manager > Data Sources > Settings > Scroll down and copy your Dataset ID (this will be Pixel ID). Paste the Pixel ID in the Pixel ID field in your workflow
Set the Event Type (e.g. Lead or Purchase), along with a Value if applicable. This is typically for purchases - for example, if someone purchased a $97 product, you'd enter $97 in this field so Facebook can track the value of this purchase
Toggle on the [Custom Mapping] > then click the [tag icon] and insert the corresponding custom value: {{contact.attributionSource.fbclid}}
Once complete, toggle the workflow to [Publish] and hit [Save]
Since Facebook tracking operates through third-party systems, any issues with event delivery or validation need to be handled through Meta’s support channels. Ivorey™ can provide the integration points, but troubleshooting must be done directly with Meta or through their available testing tools.
Meta Business Help Center – the main hub for all official documentation and troubleshooting.
Set up the Meta Pixel – step-by-step guide for installing and verifying the Pixel.
Conversions API Setup Guide – official instructions for creating and connecting the Conversions API.
Test Events Tool – lets users test whether their Pixel/Conversions API events are firing correctly.
Event Manager – central dashboard to view data sources, pixels, and events.
Pixel Helper Chrome Extension – quick way to see if the Pixel is firing properly on a page.
Meta for Developers – Conversions API – full API reference for developers – full API reference for developers.
Meta for Developers – Pixel – technical documentation on Pixel setup, events, and parameters.
Hit the support chat widget inside Ivorey™ - we can:
Walk you through any of the steps
Troubleshoot anything that’s not working inside Ivorey™
We’re here and ready to help via the chat widget in the bottom right of your Ivorey™ account. Or if you are looking for done-for-you support, you can browse our current services here 🤍
