This article is one step from our Master Help Guide: All About Proposals & Invoices. We recommend starting with the visual walkthrough video and examples inside the Master Help Guide before diving into the technical setup below.
Each Master Help Guide acts as your project plan - teaching you the feature, laying out the steps in the right order, and linking to every resource you’ll need along the way.
This guide is perfect if you're looking to:
Create beautifully branded proposals with your brand colours, copy, and product offerings, including signature boxes and product tables
Decide if your proposals are one-time or recurring, enable autopay, direct payments, or automatic invoicing, and control invoice frequency
Determine who signs the document, what products are included, and ensure invoices are generated automatically once a proposal is accepted

In this video, we will set up your proposal template/s in your own beautiful branding and style. Most importantly, we will set up the rules for your proposals in the settings - such as whether it's one-time or recurring, who needs to sign the document, and whether you want your contacts to automatically pay or receive invoices, after accepting the proposal.
From the main Ivorey™ menu, go to Payments > hover over the Documents & Contracts tab > and select Templates
Click the [+ New] button, at the top right corner > select [Import From Template Library] > preview and choose a Proposal & Contract template
Give your template a name, and adjust all of the branding, fonts, colours, images, and copy, as needed
Ensure you have a product table and signature box in the template, and that the signature box is assigned to the "Contact" not the "Sender"
Note: You can add a second signature box assigned to "Sender", if you want to manually sign each proposal, before sending.
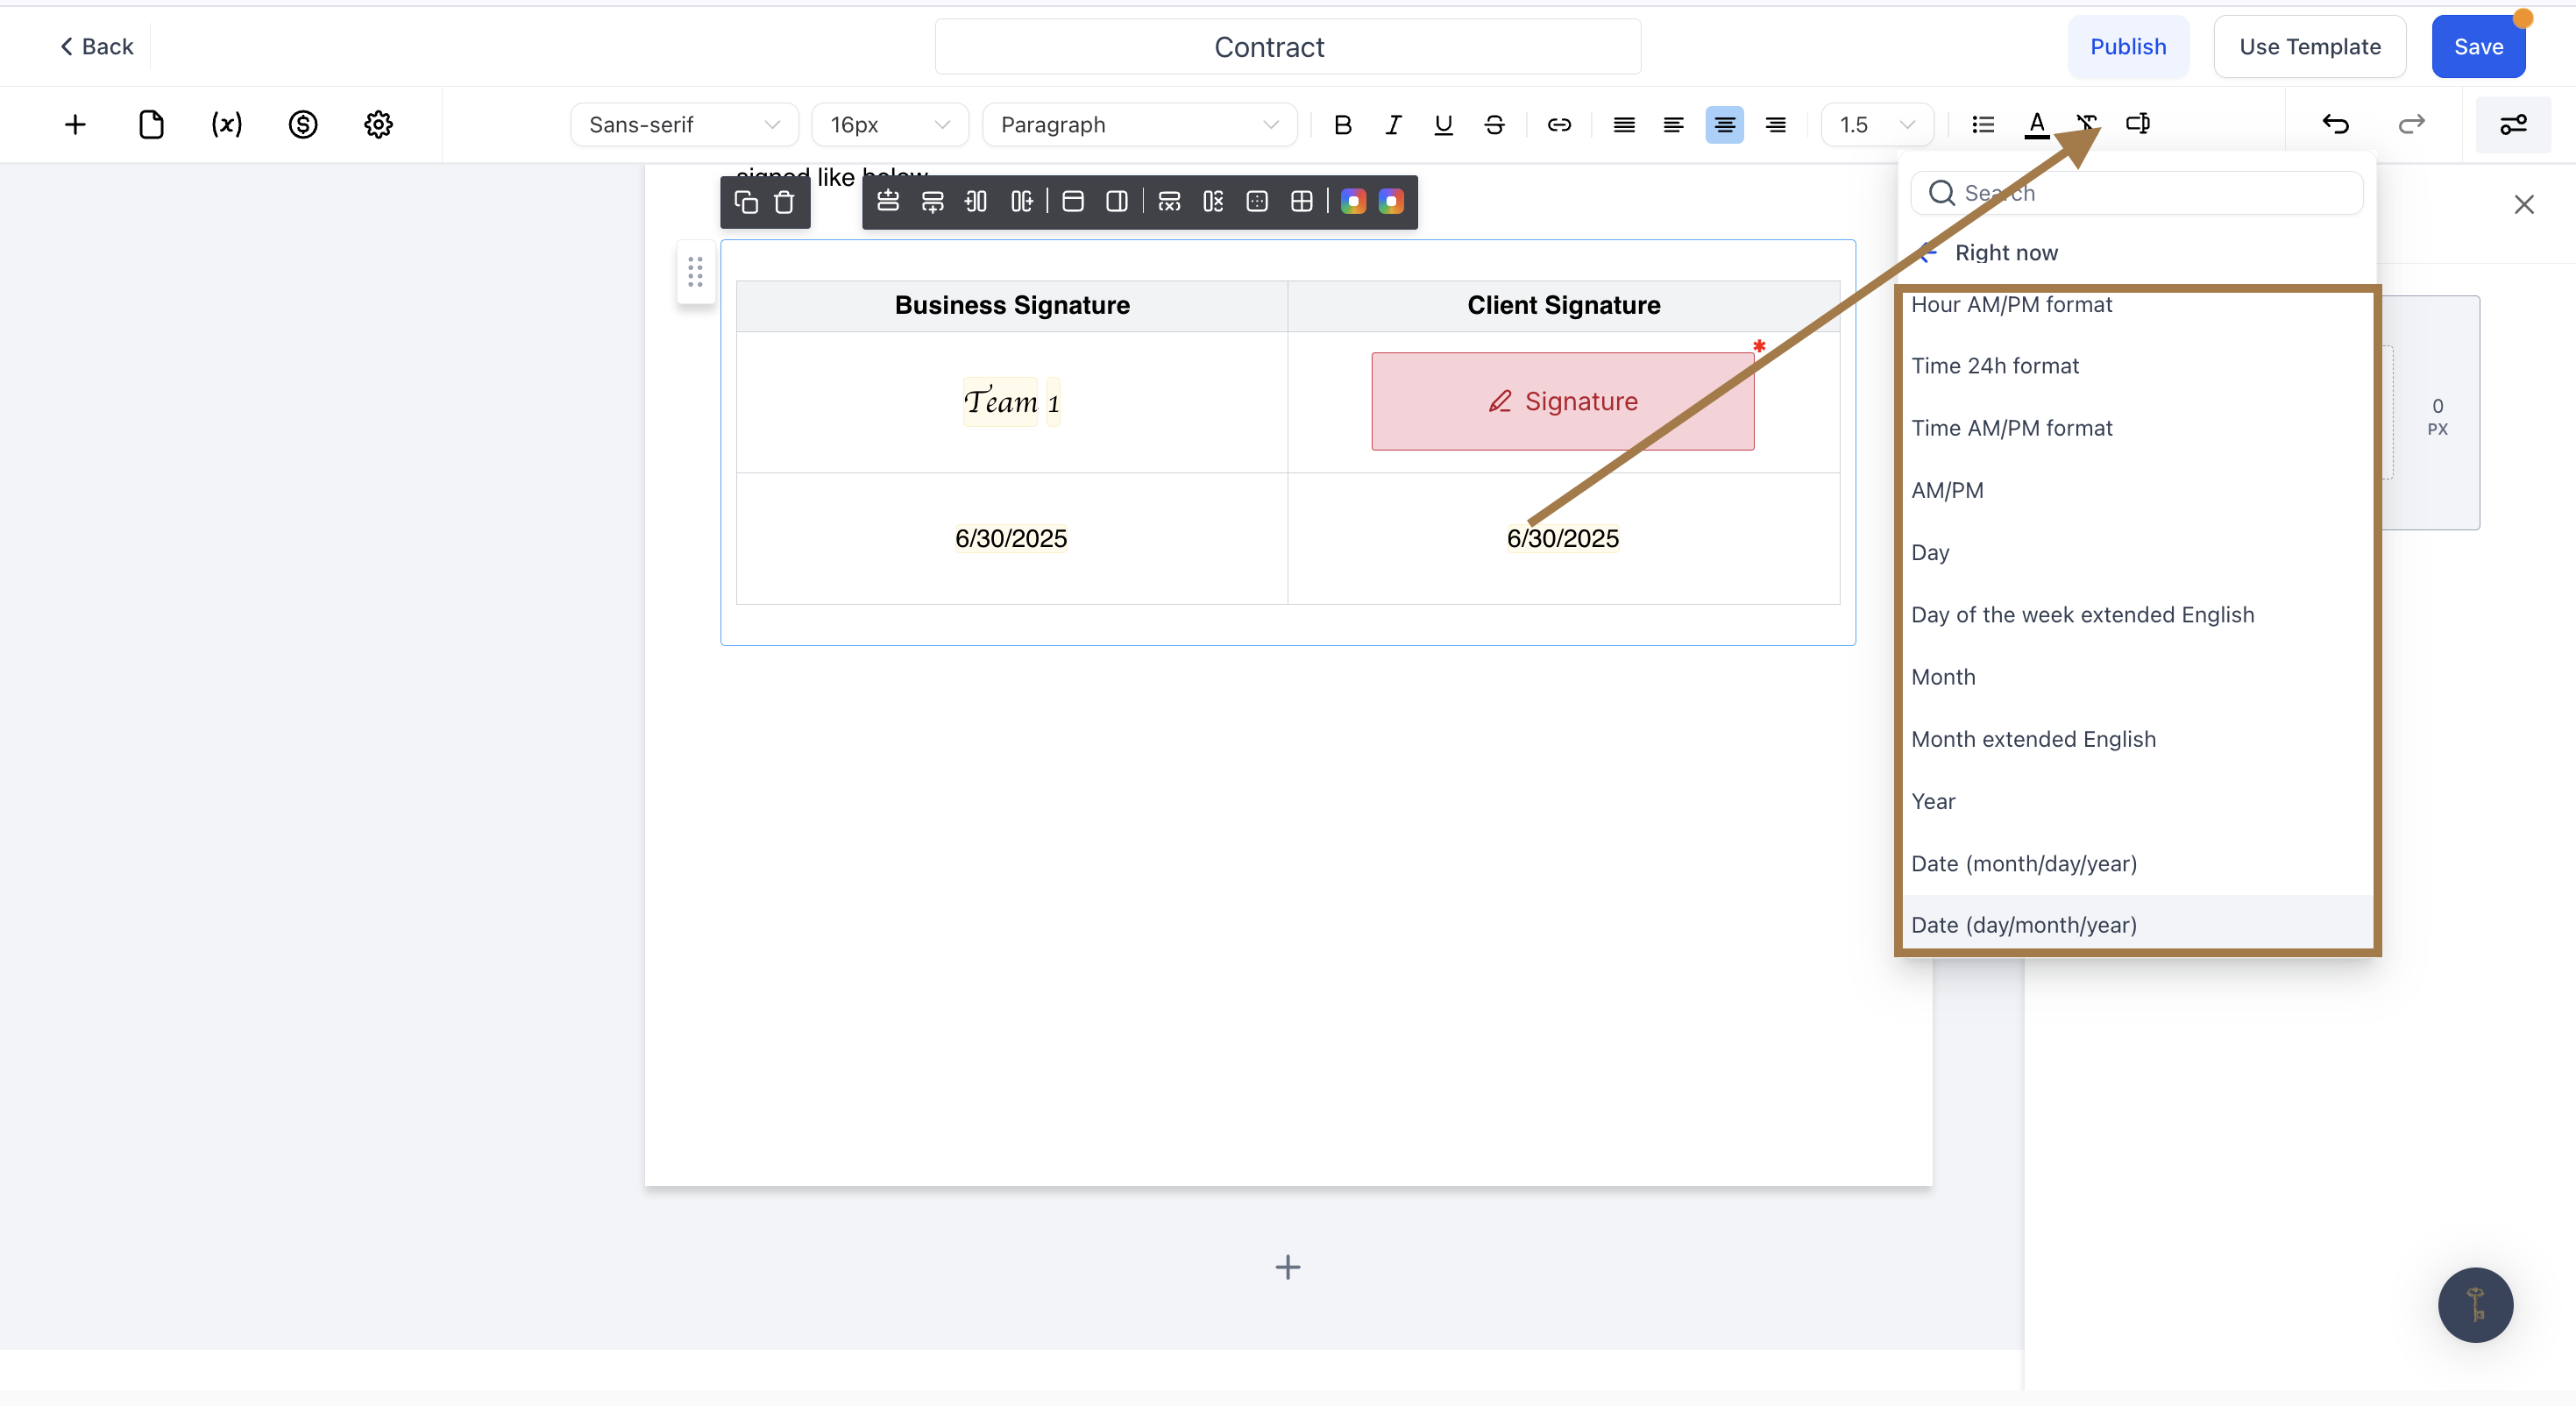
To change the format of your date inside your contract or proposal, please click the custom values icon at the top right of your menu bar > select [right now] > then choose your preference to use this in the contract instead.
If you're creating a template for a specific offer - ensure to pull in the correct products into the product table. Click on each product, to open the properties sidebar on the righthand side. Here you can:
Adjust the Price and Display Text
Decide whether or not this product is an Optional Item
Decide whether or not the contact can Edit Quantities
Add Taxes (optional)
Adjust the product table's Background Color, Margin, and Padding
In the top left corner, click the [$ Payment Settings] button, to configure the following:
Invoice Type: Select whether you want a One Time or Recurring invoice for this proposal.
Note: if you have any payment plans or ongoing payment types on your product table, select the Recurring Invoice Type. If a one-time product is selected, customers will only get invoiced once, even if the Invoice Type is set to Recurring.
Generate invoice at the time of signing (if type is recurring): If toggled ON, this will automatically generate an invoice once the proposal is accepted, which will reflect the products/settings the customer accepted
Frequency Settings (if type is recurring): Select how often they should be invoiced, select the recurring invoice start date or schedule at the time of signing, and select when to end the recurring invoices
Enable direct payment: If toggled ON, this will redirect the contact to a payment screen immediately after signing the invoice
Enable send invoice: If toggled ON, this will automatically send the invoice to the contact
Note: if Direct Payment is selected, this will automatically be toggled ON as well, so that if the customer doesn't pay on the screen above, they can still make payment from the invoice.
Enable auto payment: If toggled ON, this will charge all future invoices automatically on the same card they make their first payment through.
Note: it is very important to ensure that you have your customer's permission to do this (i.e. list it clearly in your proposal terms).
Once you've been through all the proposal settings carefully, click the [Save] button, at the top right corner of the screen. Your proposal template is now ready for use!
If you plan to customise every proposal: You only need one master template that you can brand and then customise with unique text, pricing and offerings each time you send.
If you want fixed proposals that can automatically send out: Then create a template for each proposal type that you'd like to send out.
You can monitor if someone has accepted a contract or proposal by going to the main Ivorey™ menu [Payments] then > [Documents & Contracts]. It will display a list of all documents that have been sent, and whether they are viewed, signed, paid etc.
Yes, the discount will be applied to every issue of the recurring invoice.
No! Proposal templates are only needed if you want to send branded proposals for clients to review and sign. If you plan to invoice directly without sending proposals, you can skip this step and move on to the next step in our Master Help Guide: All About Proposals & Invoices.
You can choose to automatically generate an invoice, enable direct payment so clients pay immediately, send invoices even if they don’t pay right away, and set up autopay for future recurring payments.
When you go into any contact profile, you’ll see the right-hand panel open up where you can click through the different icons to view their documents, payments, appointments, notes, and more. Access this from the “Contacts” tab on the main menu. You will find the signed proposal under documents.
For the best display inside Ivorey, proposal PDFs should be formatted in US Letter size (8.5 × 11 inches).
If the document is created in A4 format, the layout may not display correctly in the system because Ivorey is optimised for US Letter dimensions.

Hit the support chat widget inside Ivorey™ - we can:
Drop the templates directly into your account if you can't find them
Walk you through any of the steps
Troubleshoot anything that’s not working
We’re here and ready to help via the chat widget in the bottom right of your Ivorey™ account. Or if you are looking for done-for-you support, you can browse our current services here 🤍
