This article is one step from our Master Help Guide: All About Online Stores. We recommend starting with the visual walkthrough video and examples inside the Master Help Guide before diving into the technical breakdown below.
Each Master Help Guide acts as your project plan – teaching you the feature, laying out the steps in the right order, and linking to every resource you’ll need along the way.
This guide is perfect if you want to:
Learn how to create and set up an online store from scratch or using a template, fully branded to your business
Learn how to easily manage your products — add, update, toggle visibility, and control variants
Customise your store pages, including fonts, colors, backgrounds, logos, hover effects, and more
Enable dynamic product display so products automatically populate in preview and live mode once toggled for your store
Control key purchasing features like add-to-cart buttons, buy-now buttons, related products, reviews, and ratings
Save time with global sections and elements for headers, footers, and recurring design elements across all store pages
Once you have finished setting up the products you want in your Store, it's time to create and customise your store site.
From the Ivorey™ main menu, go to [Site Pages] > then along the top menu bar click on [Stores]
Click the [+ New Store] button at the top right of your screen > and select 'From Blank' > then name your store > and click [Create] (your store site should now automatically open, however if it doesn't you can just click on your store to open the site builder)
Once inside the site builder you will see the following pages:
Product List: this is your store front where all of your products will display
Product Details: this is the page your customers will be directed to when they click on a product from your Product List page
Cart: this is the page where your customers can view their cart and select to checkout
Checkout: this is where your customers are directed to pay for their products
Thank you: this is where your customers will be directed once they have completed checkout
Click [Edit] of the first store page and begin customising your store site to your brand colours, logo, imagery and fonts to create the look and feel you want to create for your customers landing on your store site
As you are customising your store site, make sure you click [Save] at the top right of your screen regularly so you don't loose any changes made
Global sections auto-update across every page - e.g. if you change the section on one page, it updates on all the pages. Perfect for things like your header and footer.
To save time turn your store header into a global section:
You can customise the header on your first store page then turn it into a 'Global Section' so you can pull this into each of your other store pages instead of having to customise each header individually. By setting up your store header as a global section, this will also mean that any changes you make to one header will automatically update all the headers on each page your global section header is pulled in on your store.
Inside the store site builder, hover over the header section until the whole header is highlighted green and click the 💾 icon
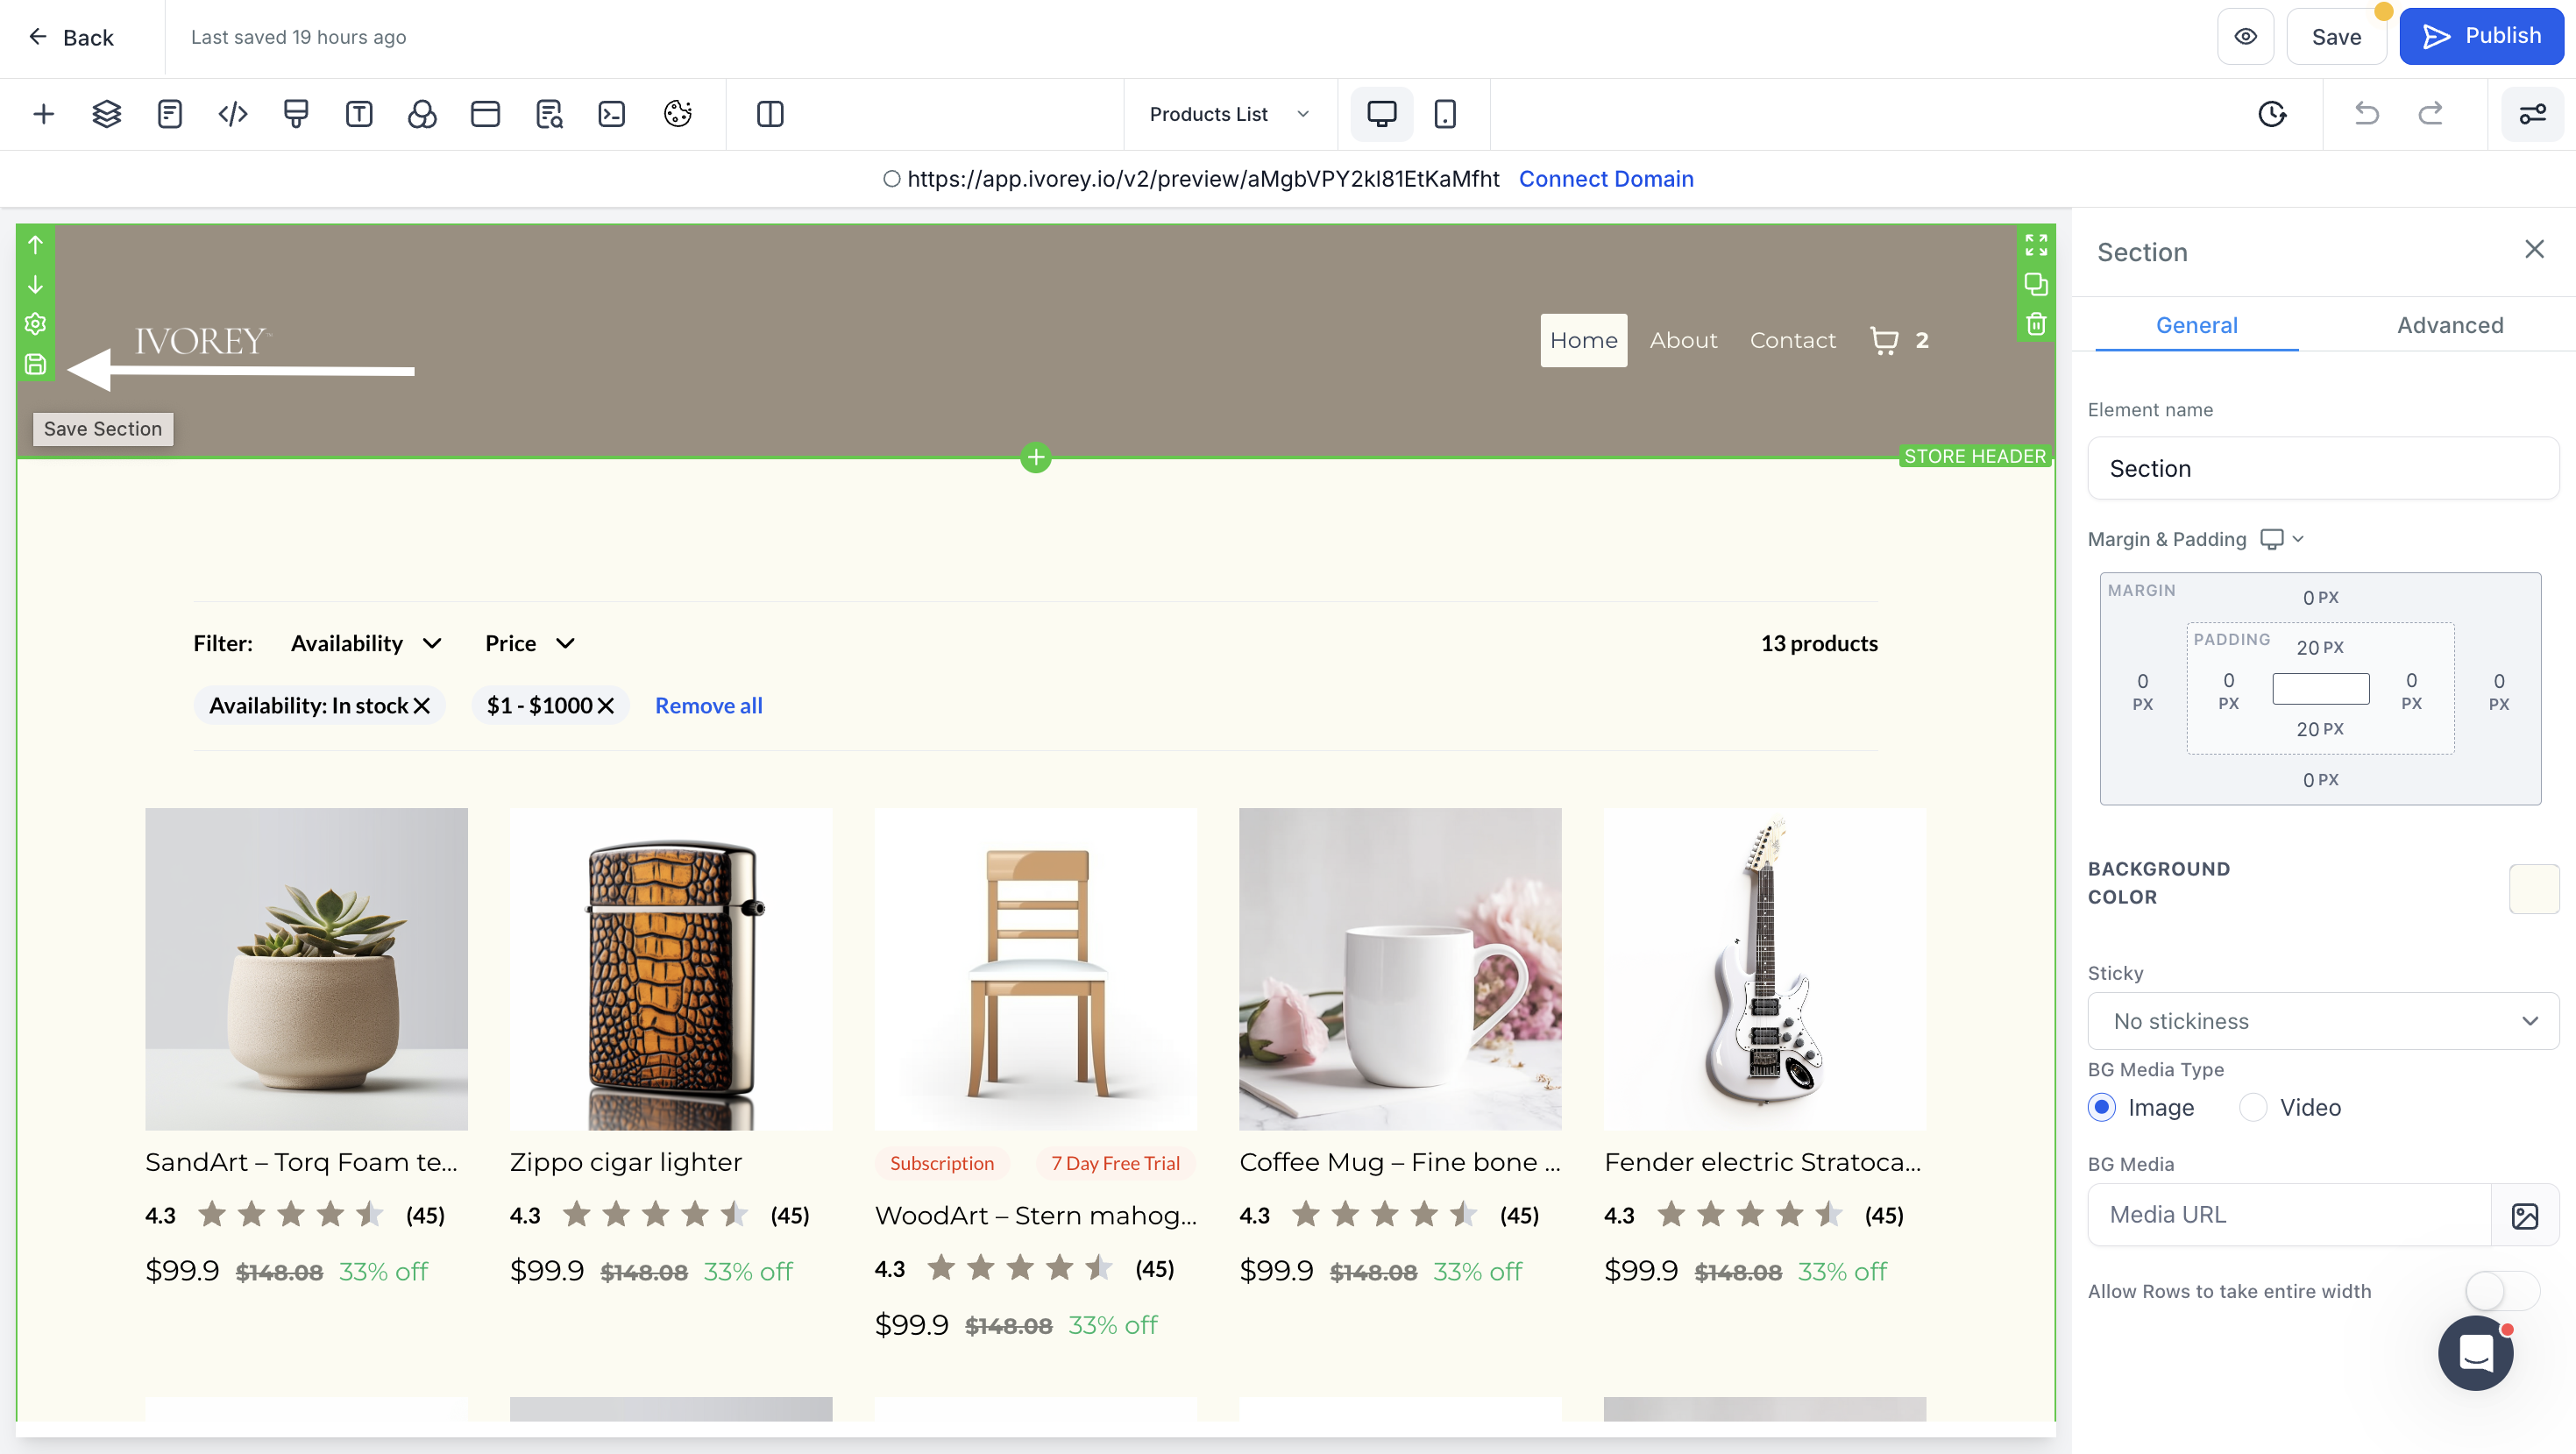
In the popup screen, name your section (e.g Store Header) > select 'Global Sections' from the dropdown menu > then click [Save]

Now if you hover over your store header section, it will highlight in purple instead of green, this means it has now been saved as a global section
To pull your new header global section into your other store pages, navigate to the next page in your store > and delete the existing header by hovering over the whole section and clicking the bin icon
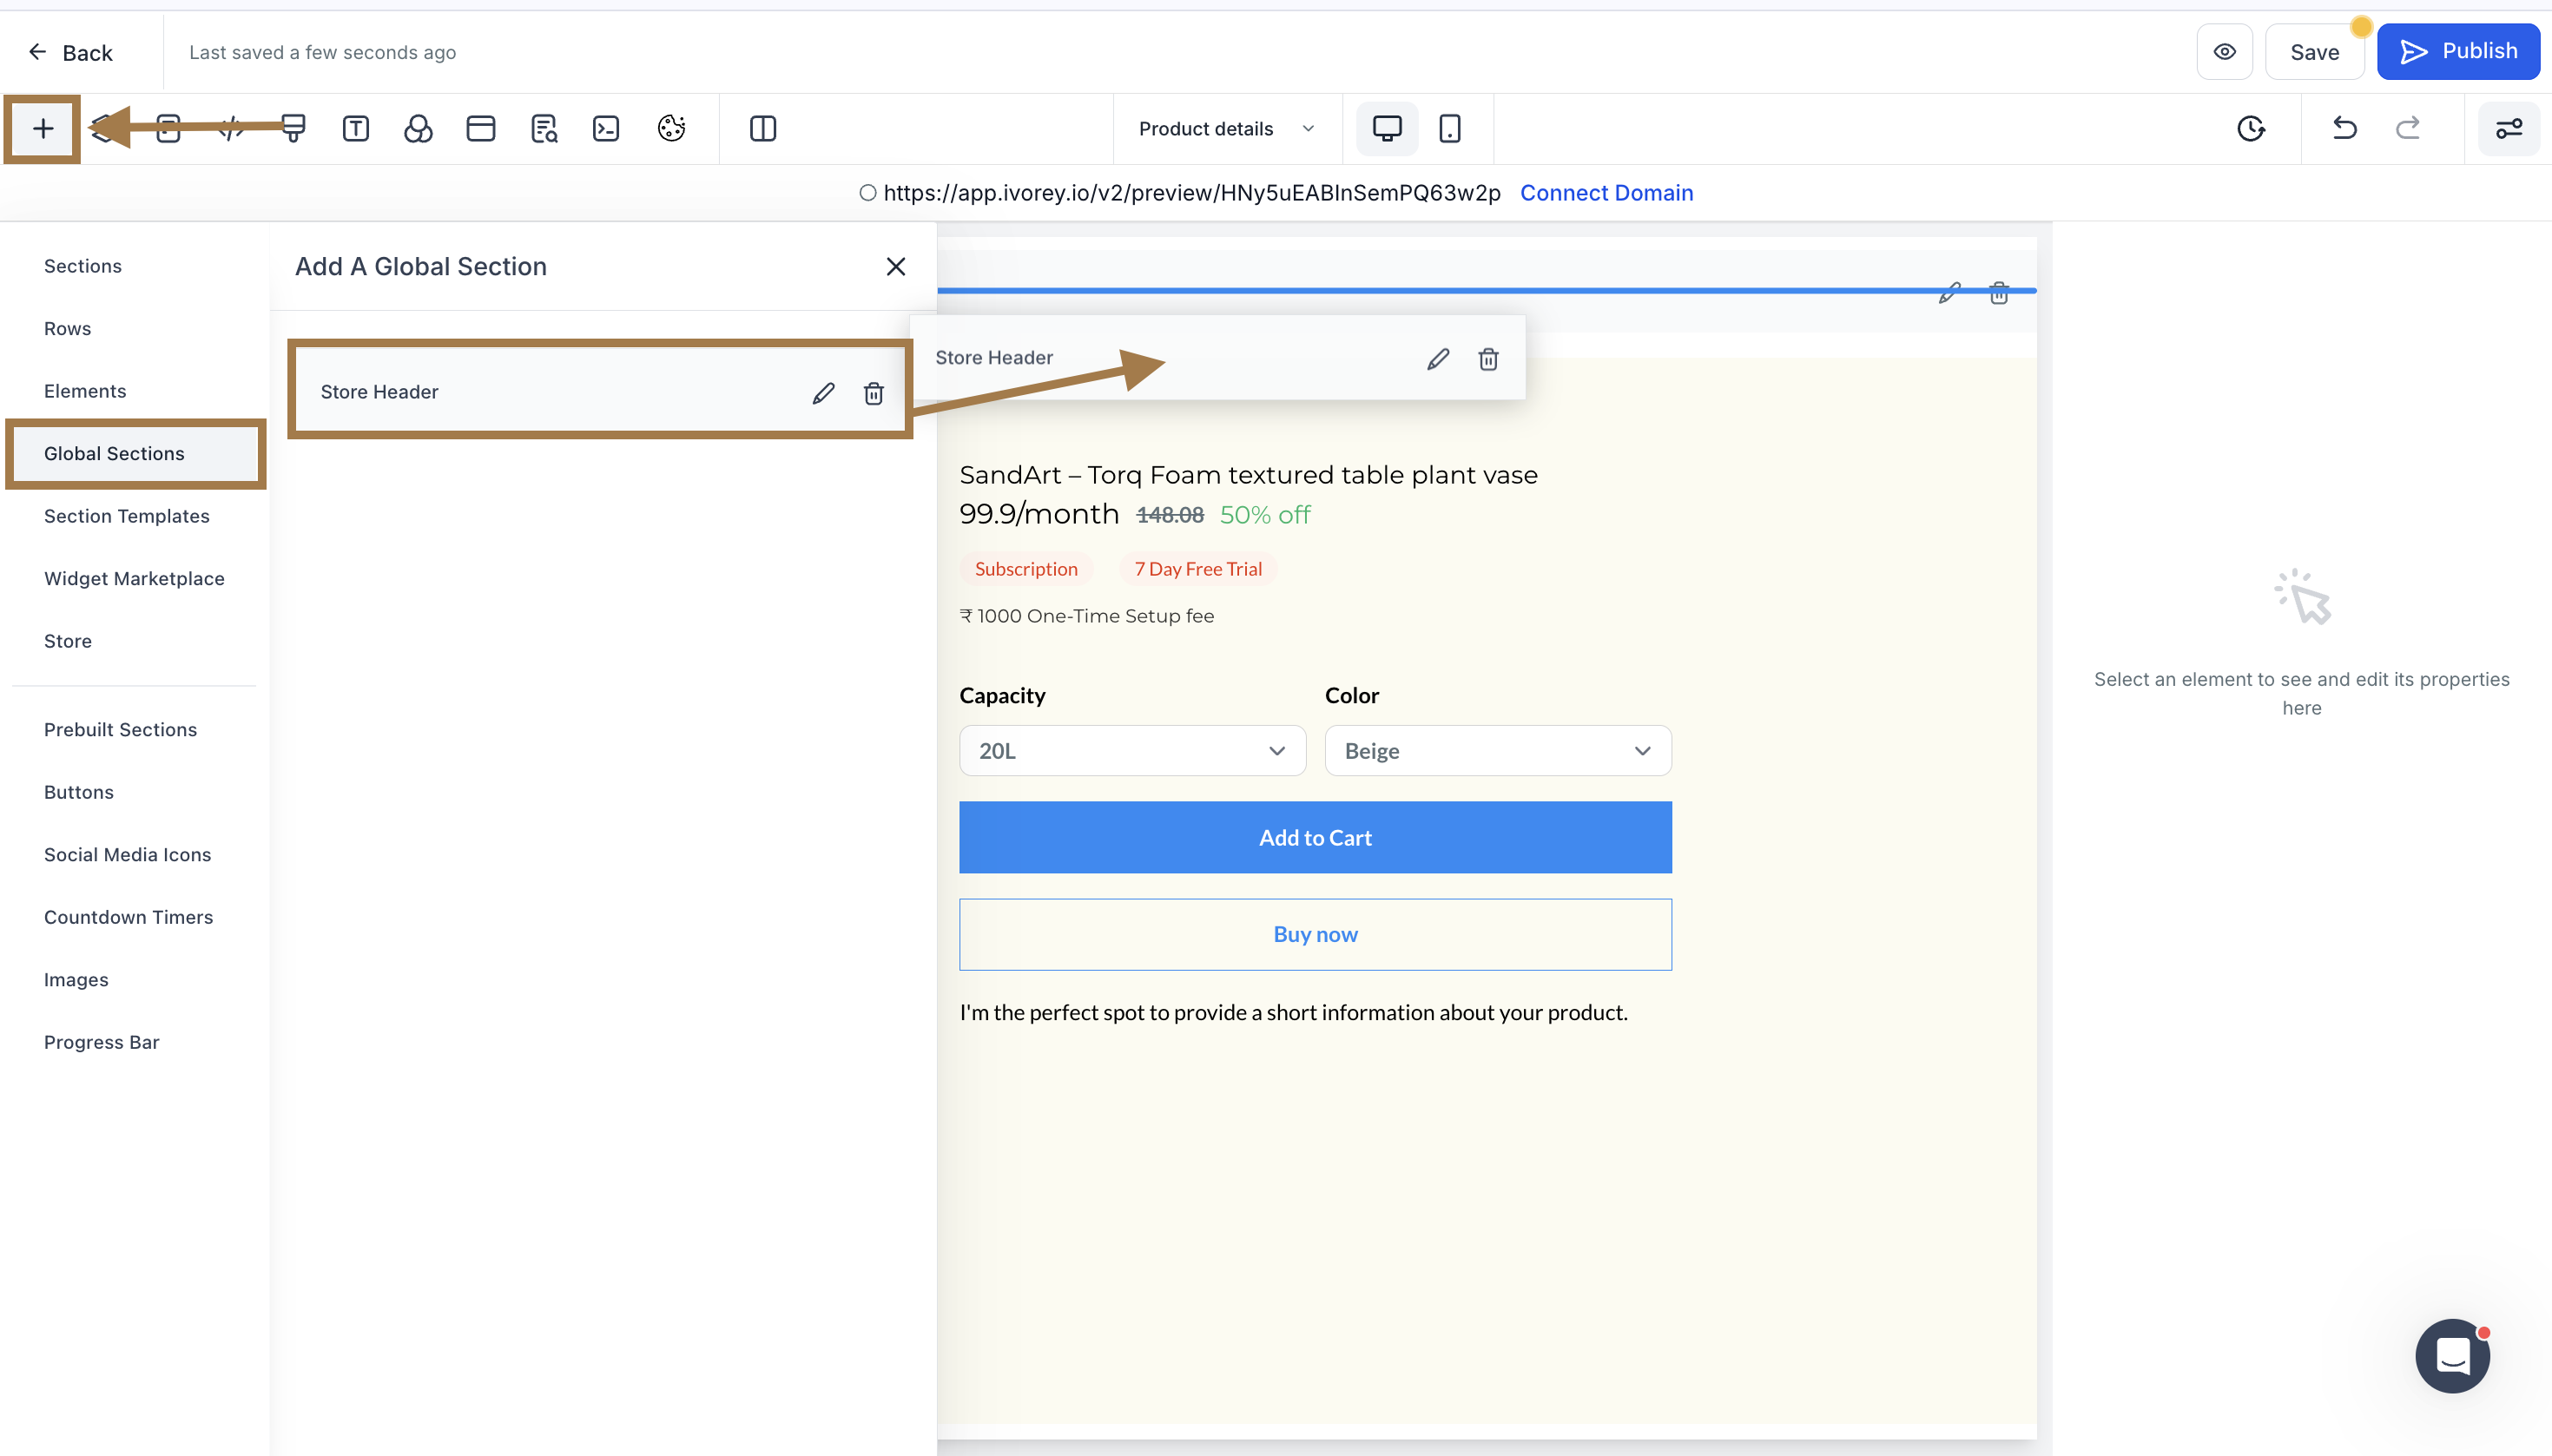
Next click the [+] icon at the top left of your screen > select the 'Global Sections' tab > and drag and drop your new header global section onto your store page
Repeat this step for all of your Store Pages that you want your header global section to display on.


Yes, you absolutely can create multiple stores within Ivorey™
You can delete a store by deleting any of the automatically added pages. If confirmed, all data related to the store will be removed and lost
No, an online store can only be configured inside a website. You can still sell products using order forms on funnels
Currently, the "Enable Terms & Conditions" checkbox is available only on Order Forms created within the Websites or Funnels builders. This specific mandatory checkbox feature is not supported in the Online Store (E-commerce) checkout at this time.
Online Stores handle legal policies, such as Terms of Service and Privacy Policies, through footer links rather than a mandatory "click-to-accept" checkbox during the final checkout step.
Hit the support chat widget inside Ivorey™ - we can:
Walk you through any of the steps
Troubleshoot anything that’s not working
We’re here and ready to help via the chat widget in the bottom right of your Ivorey™ account. Or if you are looking for done-for-you support, you can browse our current services here 🤍
