This article is one step from our Master Help Guide: All About Client Portals. We recommend starting with the visual walkthrough video and examples inside the Master Help Guide before diving into the technical setup below.
Each Master Help Guide acts as your project plan – teaching you the feature, laying out the steps in the right order, and linking to every resource you’ll need along the way.
This guide is perfect if you want to:
Customise the look and feel of your client portal
Add your brand colours, logo, and imagery
Preview and fine-tune your portal design before sharing it with clients
To customise your client portal branding, from the Ivorey™ main menu, go to [Site Pages] > then along the top menu bar, hover over [Client Portal] > and click [Settings]
Click the [Branding] tab and make your way through each field, updating the client portal to your branding. Each image has a recommended size to upload, so please ensure you are uploading images accordingly
Note: If you choose not to upload a portal image, the system will default to a gradient of the two brand colours you have set.
Once you have finished adding your brand details, click the [Save Settings] button at the bottom of your screen to save your changes
To view your client portal login page and see your branding customisations, navigate back to the Client Portal Dashboard and copy the 'Client Portal URL' into a new browser. This will open to your client portal login screen where you can then make any design adjustments needed
If you have added a branded image to your client portal login, and don't want the the Name, Logo and Description showing over the top of it on your Client Portal Login Page, you can remove these by using custom code.
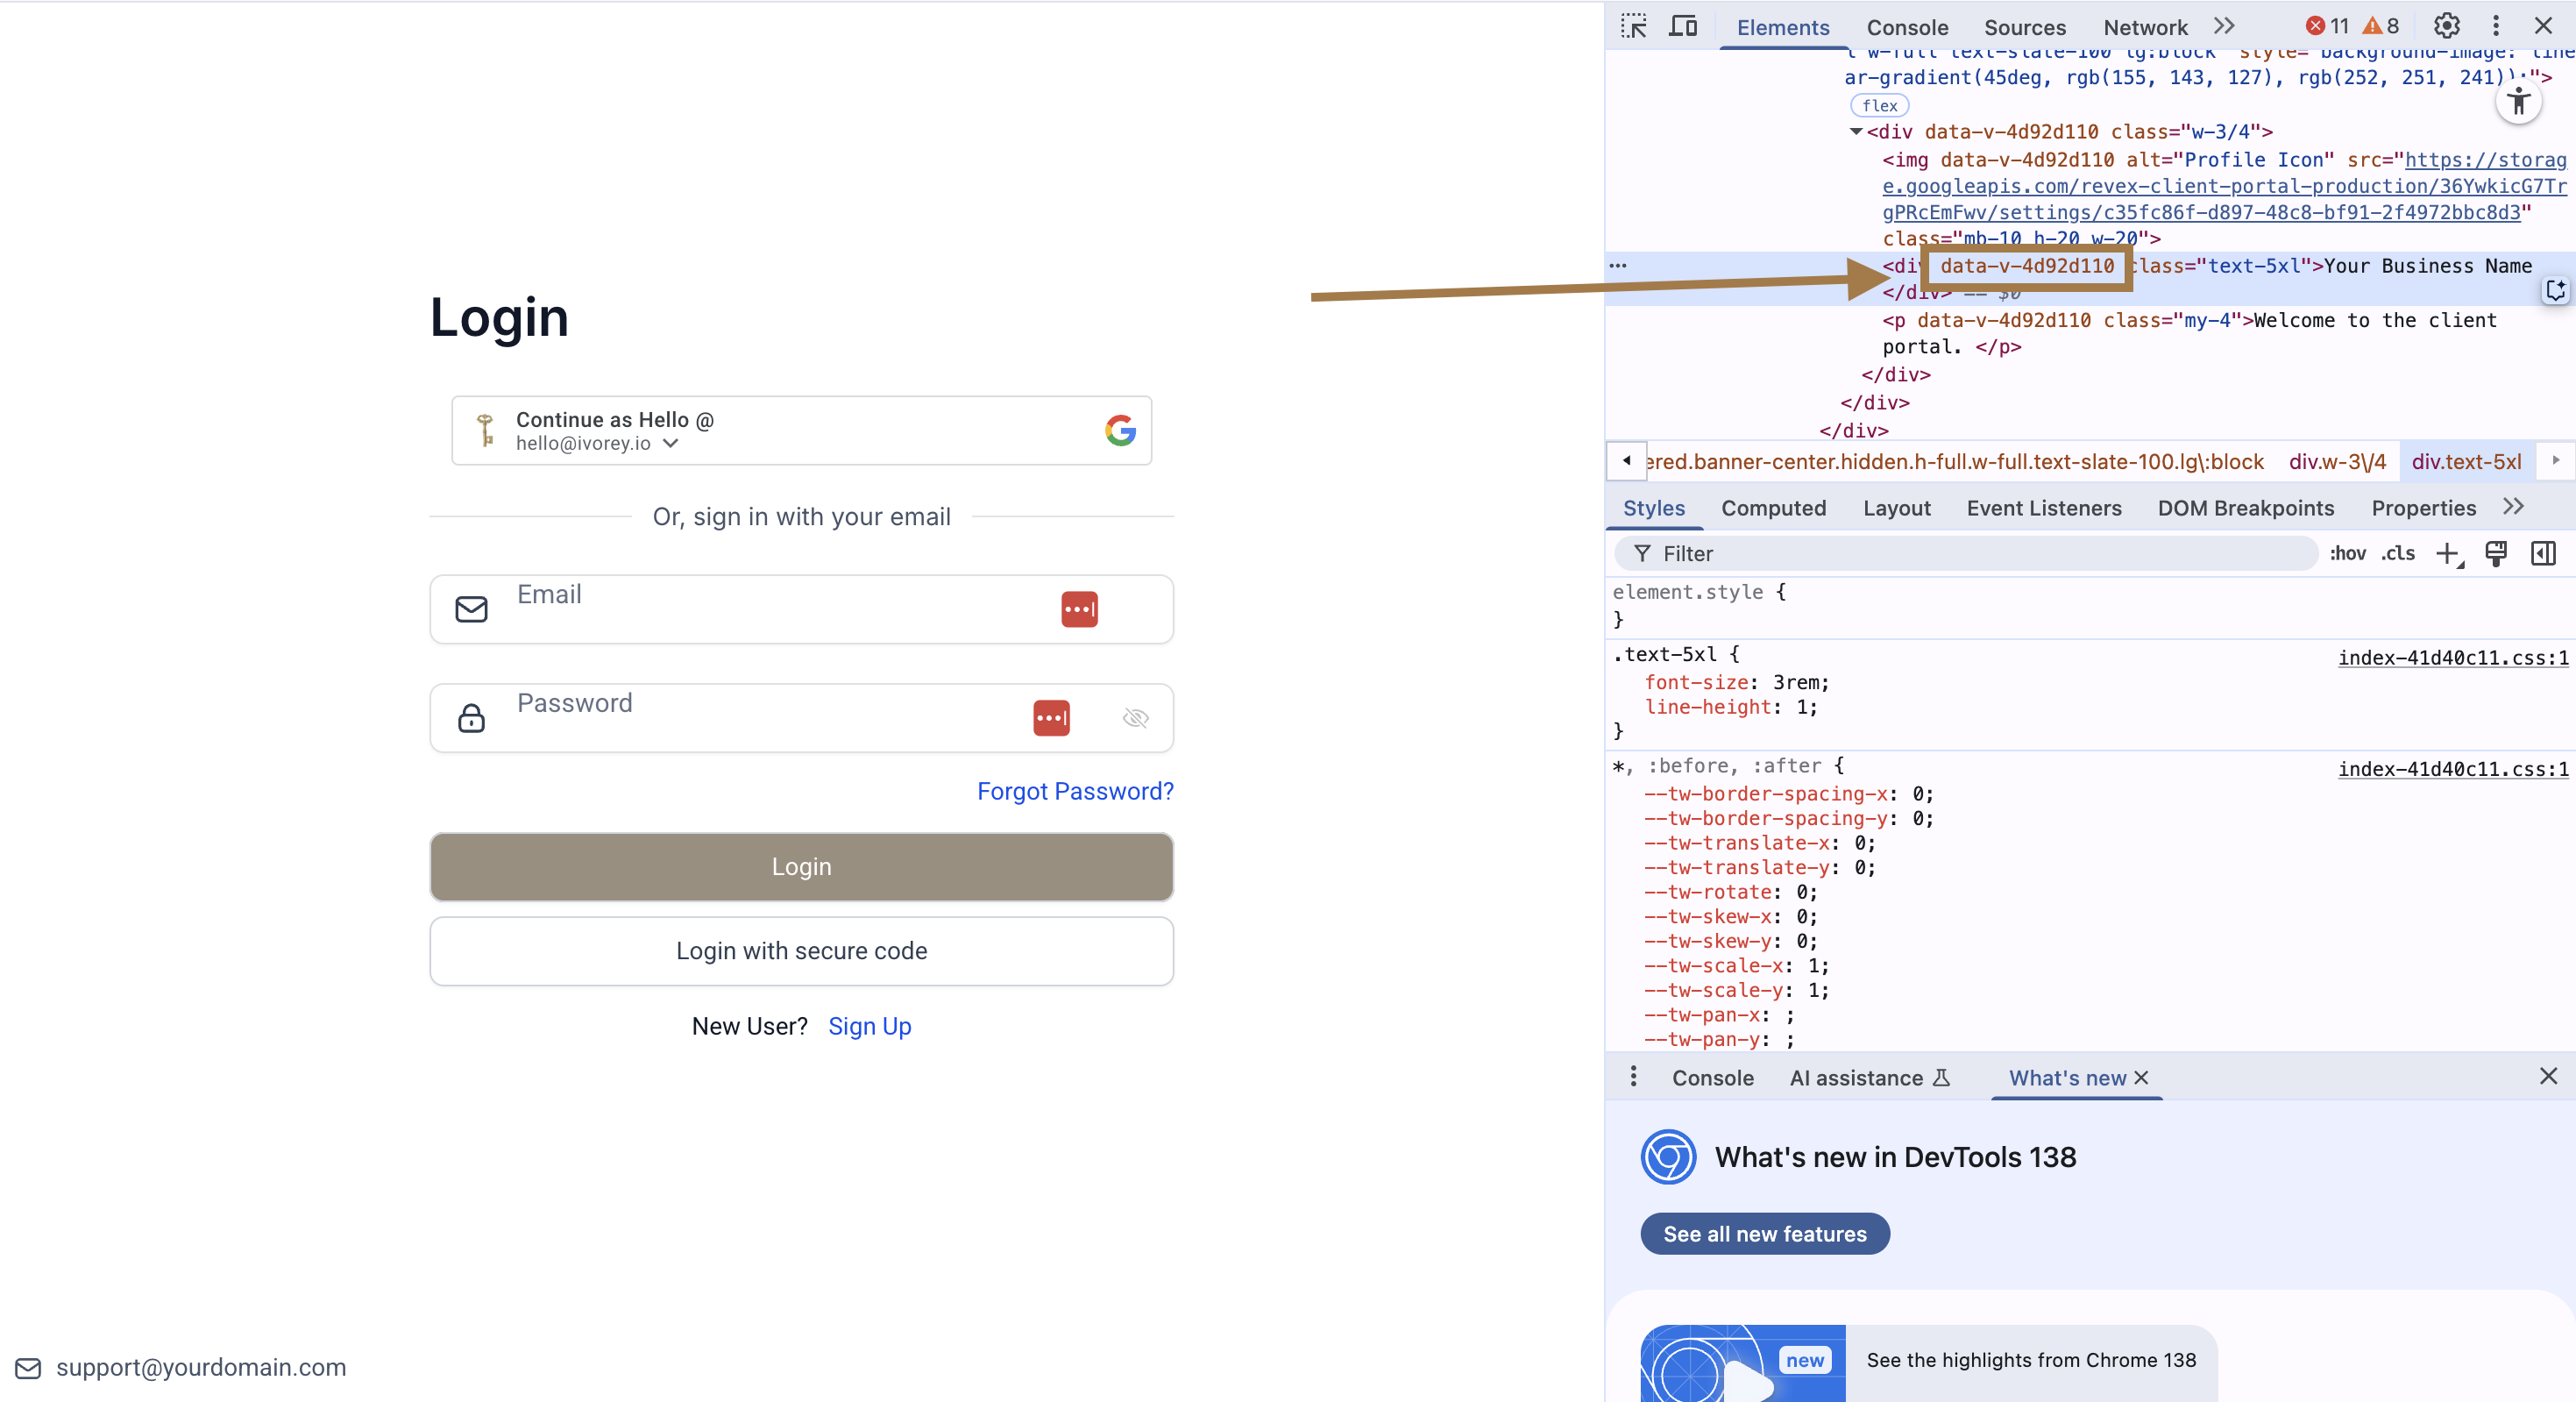
Open your Client Portal Login page and right click on the title > and select [Inspect] from the menu
Copy the value of the data-v-xxxxx attribute
Next, from the Ivorey™ main menu, go to Courses > Client Portal > Settings > Branding > click the [Advanced] drop-down > and in the Custom CSS box, add the below code:
div.text-5xl[data-v-xxxxx] {
display: none !important;
}
div[data-v-xxxxx] img.mb-10.h-20.w-20 {
display: none !important;
}
p[data-v-xxxxx].my-4 {
display: none !important;
}
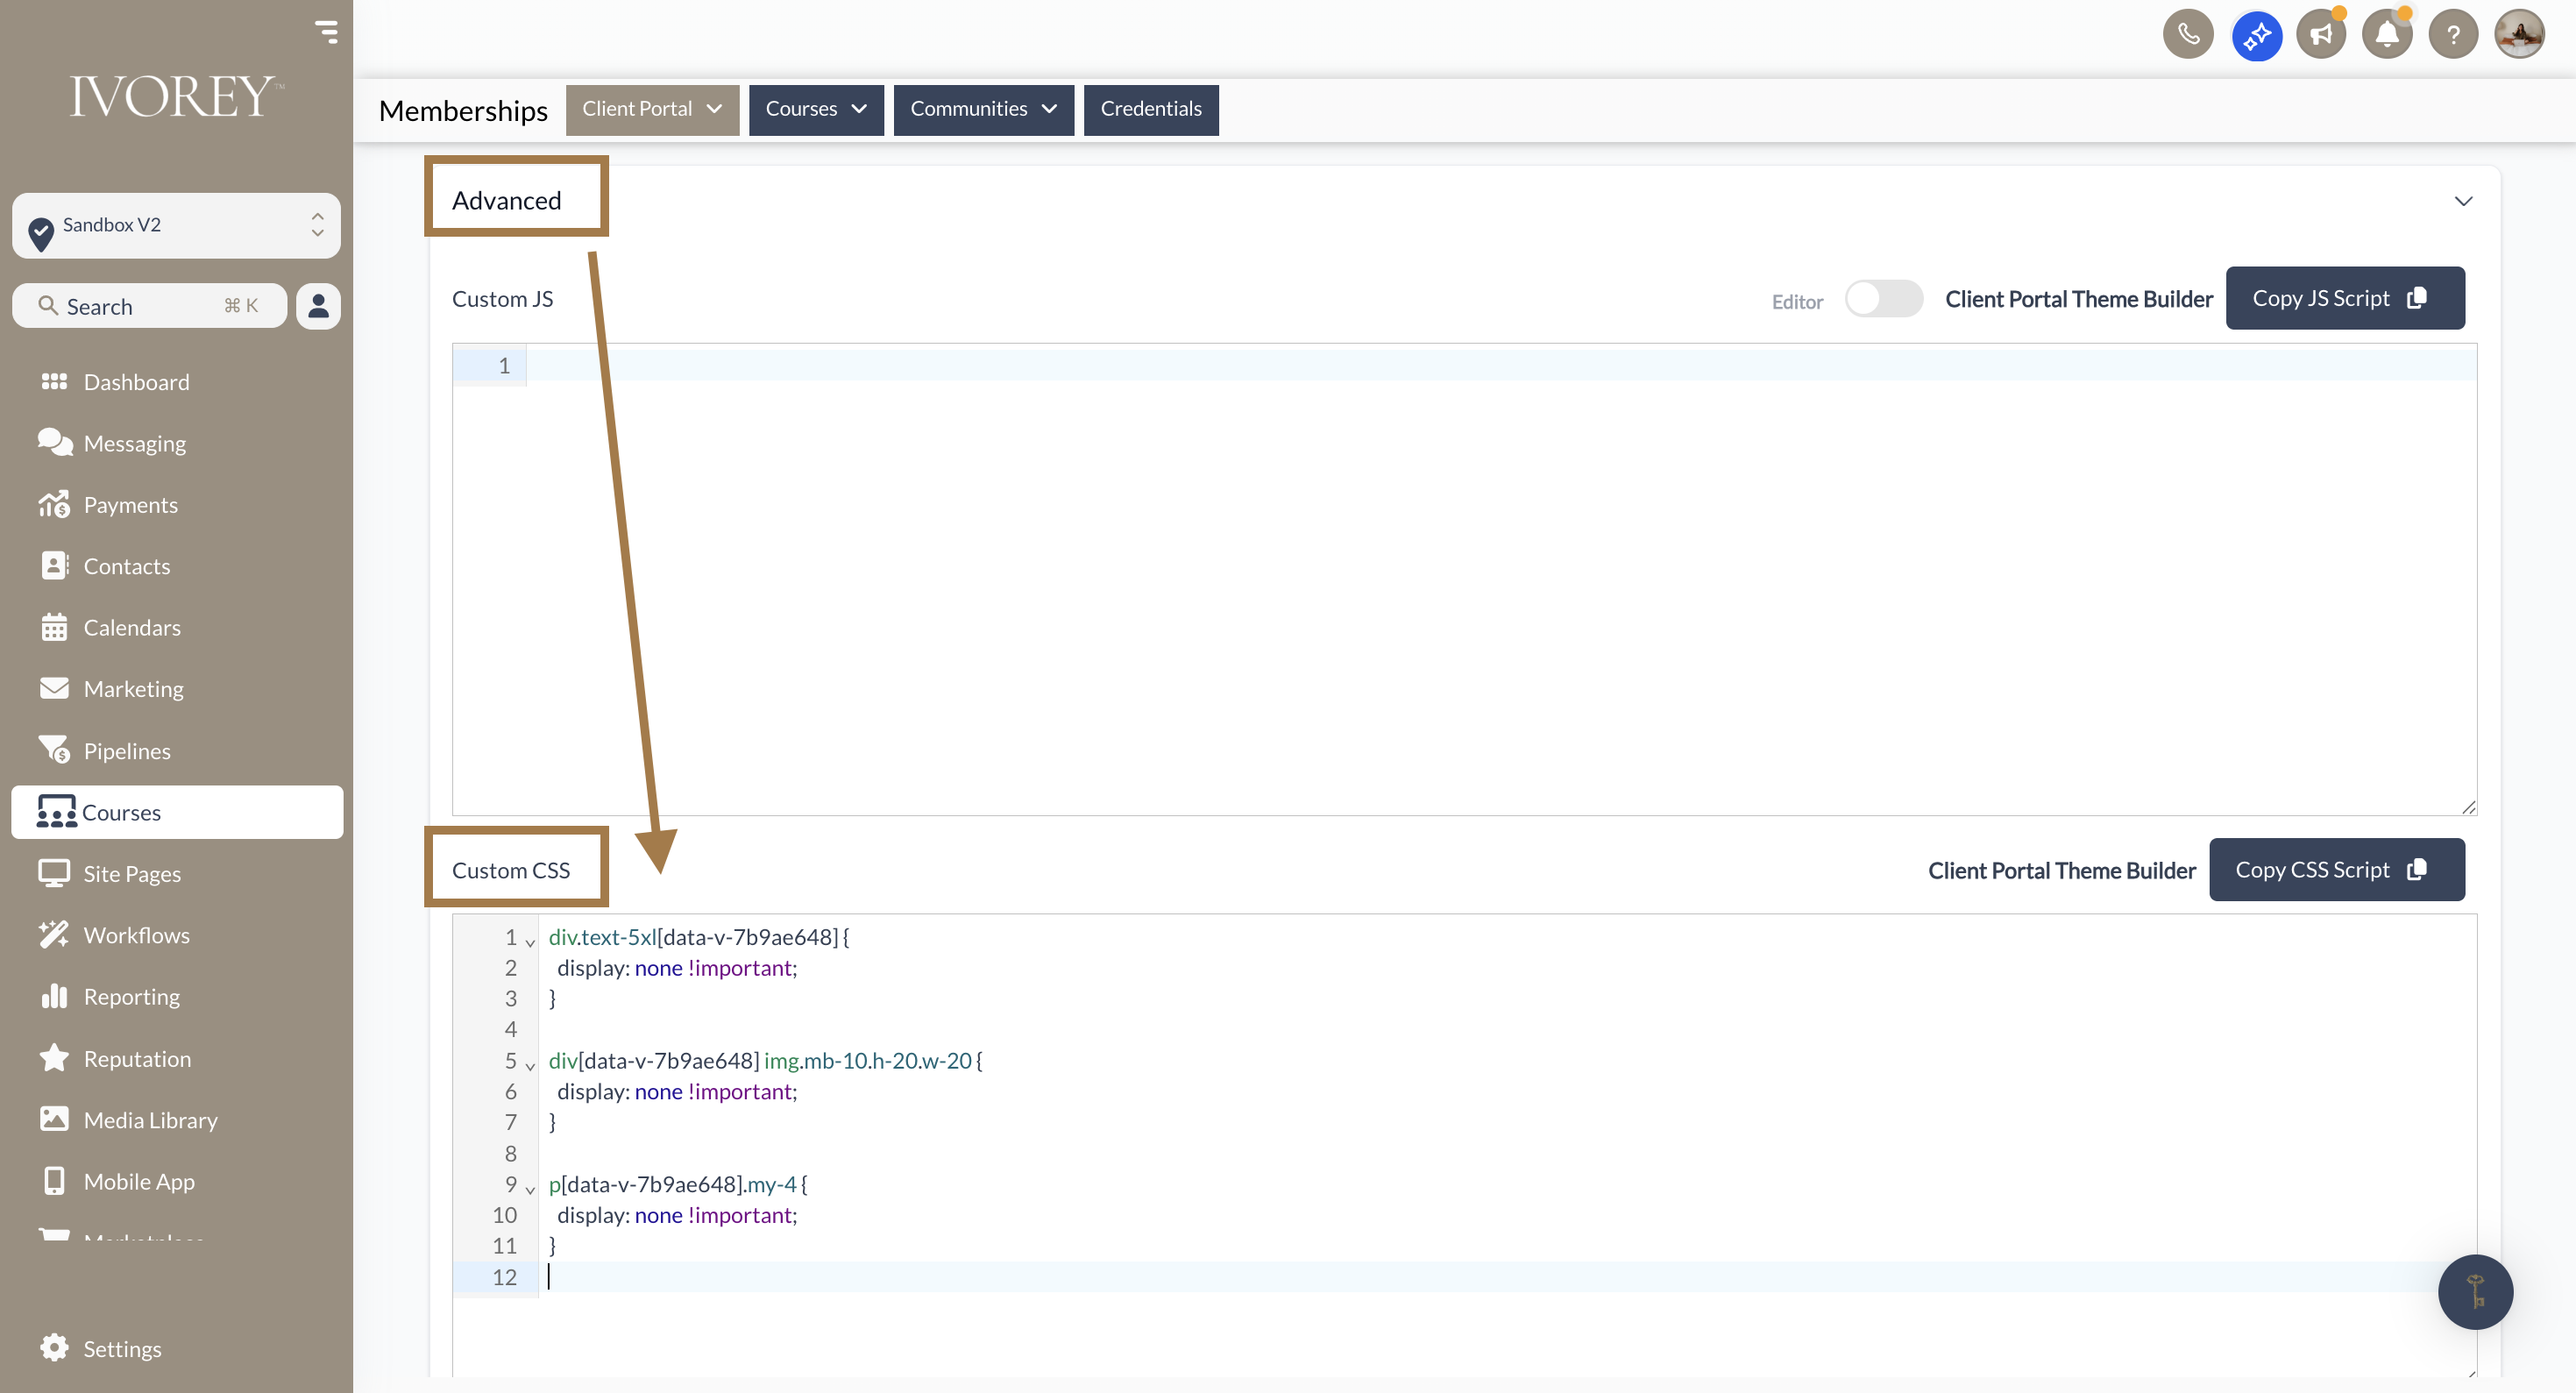
Replace the bold value data-v-xxxxx with your unique attribute that you copied from your client portal page > then click [Save]
Note: The Custom CSS added inside the Client Portal does not apply immediately. Kindly wait a few minutes, then refresh your Client Portal to see the changes take effect.

Hit the support chat widget inside Ivorey™ - we can:
Walk you through any of the steps
Troubleshoot anything that’s not working
We’re here and ready to help via the chat widget in the bottom right of your Ivorey™ account. Or if you are looking for done-for-you support, you can browse our current services here 🤍
